Which paints do I use? It depends! I use different paints based on availability and my project’s needs. Below are some products that I use most frequently. For a general list of all my various art, website, and supply resources, visit my Resources page.
Quick disclaimer: I do not speak for all body painters, everyone has their own preferences for various reasons. I’m listing products that I have personal experience with. I am also not representing any of these companies and I also can’t vouch for how any of the products will work for you and your process. That said, some of the links in this post are affiliate links from Amazon and the like, and at no additional cost to you, I’ll receive a small commission for referring you. This helps me continue doing what I do!
Water-Based Body Paints
Cameleon: The eye-popping colors first drew me to Cameleon paints (no, that’s not a typo in Cameleon). I love the opacity and they’re great for line work too. The baseline Cameleon paints are free of any animal origin ingredients, are BSE free, and are not tested on animals. They are glycerin-based and use paraffin wax as a binder. Cameleon Paint is FDA and EU Compliant and is paraben-free, sulfate-free, with no perfumes and no drying agents. I typically use these (and the other cake paints listed below) with a brush and occasionally a sponge. Cameleon paints are not available locally in Dallas but you can find even more colors from their US distributor.
Mehron Paradise AQ: When I first got into body painting, I started with Mehron Paradise cakes. They are lovely for blending and once they’re activated with water they have a creamy consistency. Mehron Paradise AQ is vegan and is not tested on animals and is unscented. If you want to try a lot of colors in small quantities, check out the Mehron Pro Face Paint Palette with 30 colors. Mehron Paradise cakes are available in Dallas at Camera Ready Cosmetics or Norcostco Theatrical Supply.
Wolfe FX: I primarily use the Wolfe FX white and black because they are excellent for bold line work, but sometimes they are hard to find in stock. I’ve used TAG black and TAG white, or Cameleon black and Cameleon white as an alternative. Diamond FX black and Diamond FX white are also good options but I have limited experience with them. Wolfe FX paints are sometimes available locally at Norcostco Theatrical Supply, otherwise I order them online.
Hybrid and Alcohol-Based Body Paints
Hybrid Paints: I like to use ProAiir and FAB hybrid paints because they’re great for vibrant colors and opacity. You can get a lot of coverage very quickly with them. Plus they are water-resistant and sweat-resistant, so they’ll hold up for an underwater photoshoot or an acrobatic performance. Some of my favorite colors are the ProAiir electric blue and cobalt. For some extra staying power, I seal it with ProAiir Prolong Extender. Hybrid paints are made with 100% cosmetic blend alcohol (same alcohol that is used in hair sprays, mouth wash, eyeliner, etc.). The ProAiir paints are made in the USA and are scented (similar to green apple scent). I usually use an Iwata Eclipse CS airbrush to apply ProAiir, however you can also use a sponge or kabuki brush to apply to large areas. When I use my Iwata bottle-feed airbrush, I often use the ProAiir Snorkel Adaptors to connect directly to the bottle of paint. ProAiir is available locally in Dallas at Norcostco.
Alcohol-Based Paints: The Endura paints from European Body Art (EBA) are my other go-to for long-lasting airbrush paints. These alcohol-based paints are water- and sweat-resistant and work best with an airbrush. I personally tend to use them for more subtle effects or lighter coverage but you can also build them up. I apply these paints with an Iwata Eclipse CS airbrush or an Iwata bottle-feed airbrush. EBA paints are available locally in Dallas at Norcostco.
Glitter and Metallic Body Paint
Glitter: I’ve switched over to biodegradable glitter and feels good to have more environmentally-friendly products in my kit. I’ve ordered bio glitter from Amerikan Body Art in Florida, Body FX in New Zealand (available in the US from Silly Farm) and from Universal Soul in Los Angeles. The Bio Glitter from Body FX is produced from biodegradable film which is derived from sustainable sources and Universal Soul’s glitter is made with cellulose film derived from eucalyptus trees. It’s completely shelf stable and the degradation process will only begin in soil, waste water or compost where micro-organisms are present. They’re both suited for dry, water-based, or oil-based applications. While it’s crucial to use cosmetic glitter in body painting (don’t use craft glitter on your face!), some cosmetic glitter is still considered a micro-plastic and doesn’t biodegrade once it goes down the drain. It can make its way into our waterways and oceans and get ingested by fish and other organisms. There are quite a few bio glitters available from different vendors and I’m currently trying to use options that are available in the US to reduce the shipping distance for the small quantities I use.
Metallic Effects: The Mehron Metallic Powders are my go-to for a cost-effective full body paint metallic finish. You can find these in gold, silver, rose gold, copper, bronze, and lavender. Be sure to purchase Mehron Mixing Liquid to mix into the powder. Mix small amounts of the Mehron powder with Mehron Mixing liquid and brush it over the body. For a more yellow gold, I’ve brushed on a gold Mehron Paradise cake (the product photo looks a bit like tan, but it is really a more yellow gold) or gold Cameleon cake, then applied a gold shimmer powder from Ben Nye. The Mehron and Ben Nye products are usually available locally in Dallas, TX at Norcostco Theatrical Supply.
Body Paint for Specific Looks
Avatar: For my personal Avatar body paint costumes, I used the Kryolan Aquacolor in baby blue for the base coat. For the stripes, I used the Avatar Rainbow Cake from Silly Farm. It has a dark blue and a light blue side. I use the darker blue for the stripes, then I add a highlight on top of the stripe with the lighter blue. For the white dots, I use Wolfe FX white, Cameleon white, or TAG white.


 Need Maleficent horns ASAP for Halloween? Here’s how I made a headpiece, inspired by the 2014 movie version of Maleficent. I made these pretty quickly so the process isn’t documented as well as I would have liked, but hopefully you’ll find some useful tidbits!
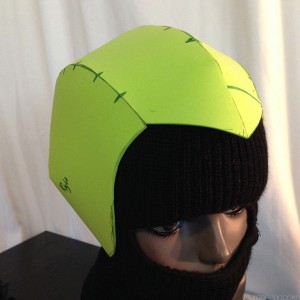
 I learned out to make this helmet from Evil Ted Smith’s
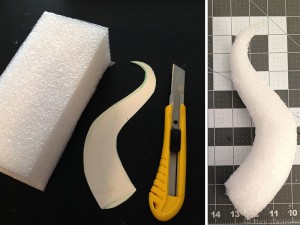
  Draw a horn shape on paper. If you need a template, check out my
 Use scissors or a box cutter to shape the horns, as if you are whittling a piece of wood. As you work on the second horn, compare it to the first one to be sure they are the same shape.
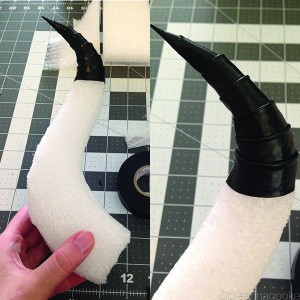
 I used
  Use contact cement to apply the fabric to the front and fold it under the front edge.


