I finally made a Mystic costume from the Dark Crystal! It’s been on my costume wish-list for a long time. There are still a lot of improvements to be made, but I got the costume to a wearable point just in time for the May Dallas Comic Con in 2015. Keep scrolling down to see my process photos.
Mystic Head
1 – Cut foam shapes from Poly Foam;
2 – Sculpted with razors and engraved lines with a soldering iron;
3 – Covered with tissue paper and spray glue;
4 – Brushed on liquid latex from BITY Mold Supply;
5 – Painted with airbrush and various acrylics. Glued on wig and hair segments.
6 – Done! Photo by Alan Tijerina Photography.

Mystic Feet
1 – Pool noodles and pipe insulation carved with razors and utility knife;
2 – Covered with spray glue and white tissue paper;
3 – Brushed on liquid latex from BITY Mold Supply;
4 – Painted with airbrush and various acrylics.

Mystic Hands
1 – Poly foam and pipe insulation carved with razors and utility knife (hat tip to Courtney and Scotty at Zod Fabrication for sharing their raptor hand photos!);
2 – Covered with spray glue and white tissue paper;
3 – Brushed on liquid latex from BITY Mold Supply;
4 – Painted with airbrush and various acrylics.
5 – Attached to costume. My real hands are in the front hands. Photo by Alan Tijerina Photography.

Mystic Body
1 – Poly foam pieces glued with Barge Cement. (I made paper templates before cutting each piece of foam);
2 – More poly foam (looks like an armadillo!). Tail made with a white bedsheet and stuffed with poly filling;
3 – Arms made with pool noodles;
4 – Arms covered with poly foam;
5 – Shirt made from two bedsheets and hand-sewn to fit;
6 – Final costume worn at #DallasFanExpo

Mystic Armor
1 – EVA foam (anti-fatigue mat) for armor pieces. Shaped with heat gun. (I made paper templates before cutting each piece of foam);
2 – Traced each piece of armor in fabric;
3 – Glued fabric to EVA foam with spray glue;
4 – Glued pieces of tan fabric for details, painted with airbrush and various acrylics;
5 – Closeup of bracer;
6 – Final costume worn at #DallasFanExpo


 Need Maleficent horns ASAP for Halloween? Here’s how I made a headpiece, inspired by the 2014 movie version of Maleficent. I made these pretty quickly so the process isn’t documented as well as I would have liked, but hopefully you’ll find some useful tidbits!
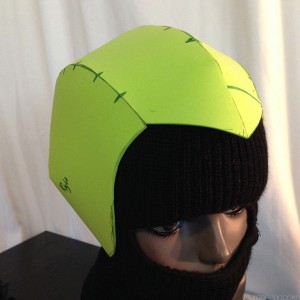
 I learned out to make this helmet from Evil Ted Smith’s
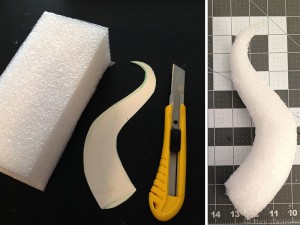
  Draw a horn shape on paper. If you need a template, check out my
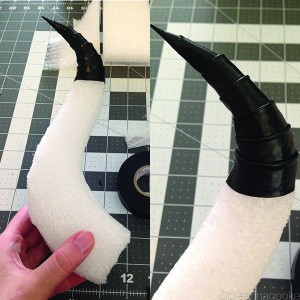
 Use scissors or a box cutter to shape the horns, as if you are whittling a piece of wood. As you work on the second horn, compare it to the first one to be sure they are the same shape.
 I used
  Use contact cement to apply the fabric to the front and fold it under the front edge.

